How to use an Adafruit Huzzah with Neopixel FeatherWing
I accept that not everyone has the skills to assemble electronics, so to that end I decided to see if there is something on the market that people could use relatively easily.
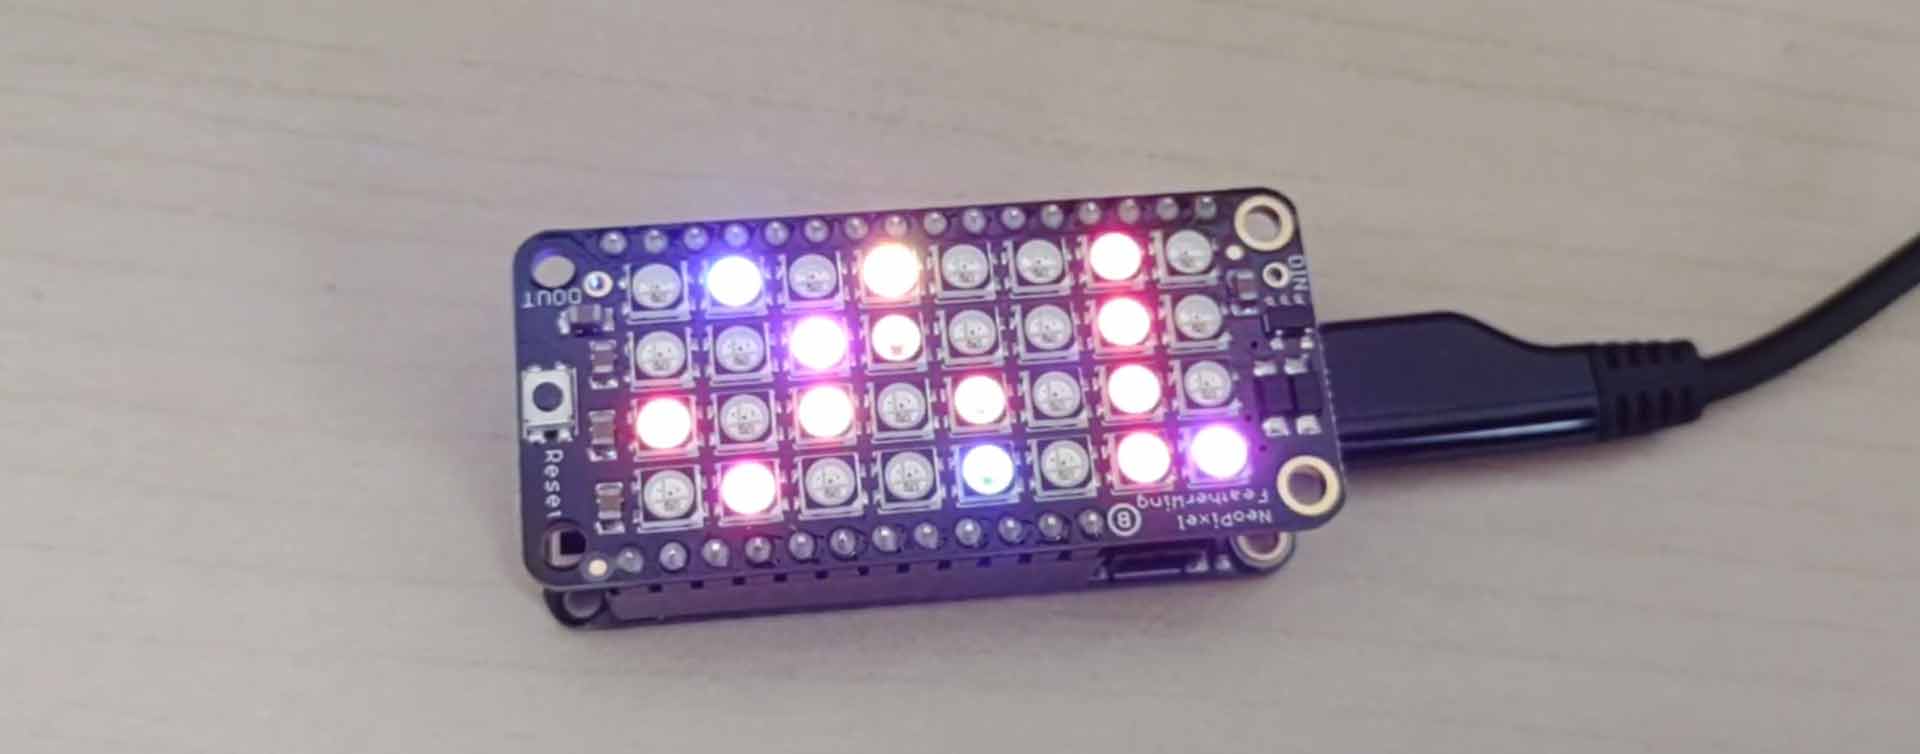
One product (well actually two) is an Adafruit Huzzah with a Neopixel FeatherWing. The Huzzah is a nice small form factor and the wing fits nicely on top.
Alas you do have to do some minor tweaking
Where can I get the parts
- Adafruit Feather HUZZAH with ESP8266 (the Adafruit shop)
- NeoPixel FeatherWing - 4x8 RGB LED Add-on For All Feather Boards (the Adafruit shop)
- Adafruit Feather HUZZAH with ESP8266 (the Pimoroni shop)
- NeoPixel FeatherWing - 4x8 RGB LED Add-on For All Feather Boards (the Pimoroni Shop)
Background
The LEDs on the FeatherWing are controlled with a single data pin, by default the data pin is number 16. Unfortunately for us the Huzzah doesn't support pin 16 so it has to be changed to another.
Fortunately Adafruit thought of this and provided lots of alternative contact pads that can be closed allowing us to set the data pin to one of the other numbers.
There a different versions of the WLED firmware that use different pins, in this instance I'll be closing pin 2.
Minor Tweaking
Before the Neopixel FeatherWing will work with the Huzzah we have to cut one of the tracks and close another one (simple blob of solder between two contacts)
I use a scalpel to cut the track. DO NOT CUT THE HUZZAH ONLY THE FEATHERWING!
Having cut the track to pin 16 close the contacts for 2.
Uploading the firmware
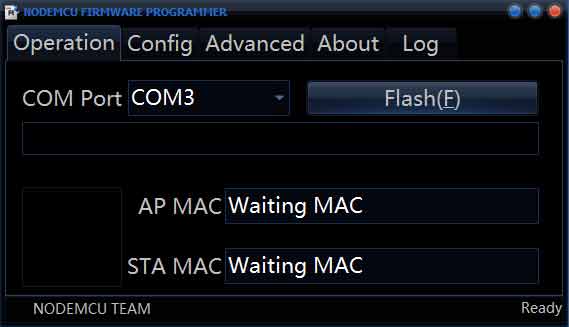
To program the Huzzah I use the ESP8266Flasher (there are others available)
You can download the flasher at the address below (you'll find it in the Win32/Release or Win64/Release folders)
https://github.com/nodemcu/nodemcu-flasher
Now you have a programmer you need the firmware
The Huzzah is based on the ESP8266 and has 4MB of memory
The firmware you'll need is name WLED_x.xx.x_ESP8266.bin (where the x's refer to the release number)
Visit the page https://github.com/Aircoookie/WLED/releases and download the file.
Now you have the firmware and the programmer it's time to program.
Step 1
Plug the Huzzah into a USB port
Step 2
Start the programmer
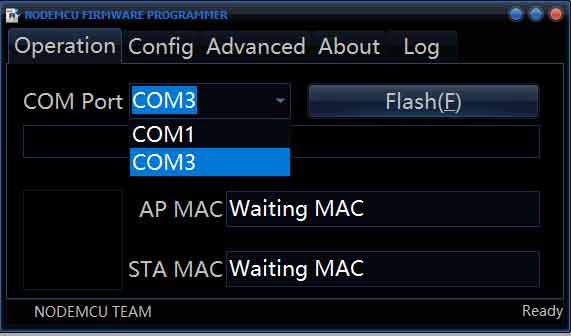
Step 3
Select the COM port for the Huzzah
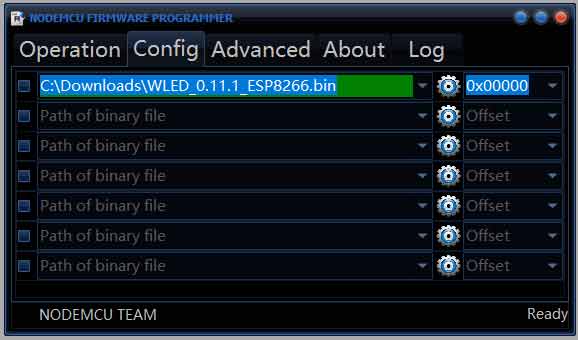
Step 4
Go to the Config tab, click the Cog icon on the firm line and then browse for the firmware downloaded earlier.
Step 5
Go back to the Operation tab and click Flash
Step 6
Celebrate a job well done with nice cup of coffee (or tea) (....and possibly cake).
You can go through the configuration steps of the WLED firmware.
The device will appear as a new Wifi network called WLED-AP and has a default password of wled1234
You can then connect to the device on it's IP address of http://4.3.2.1
From there you connect the device to your own Wifi network, give it a name so Alexa can communicate with it etc.
Arrgh my eyes
To help with eye strain from bright LEDs there are a number of things you can do.
- In the LanternScape desktop app turn the brightness down
- Reflect the light off something else (point the LEDs away from you and bounce the light off another surface)
- Diffuse the light from the LEDs (in the devices I made, I used 3mm thick opal acrylic)
- There are probably other ways ....