How to use an ESP-01s and a cheap LED controller
As I wanted to keep the project as accessible to as many pockets as possible I needed to find a cheap solution.
Here is want I came up with (there are almost certainly other ways of doing this I just wanted to keep complexity down too).
So what do I need?
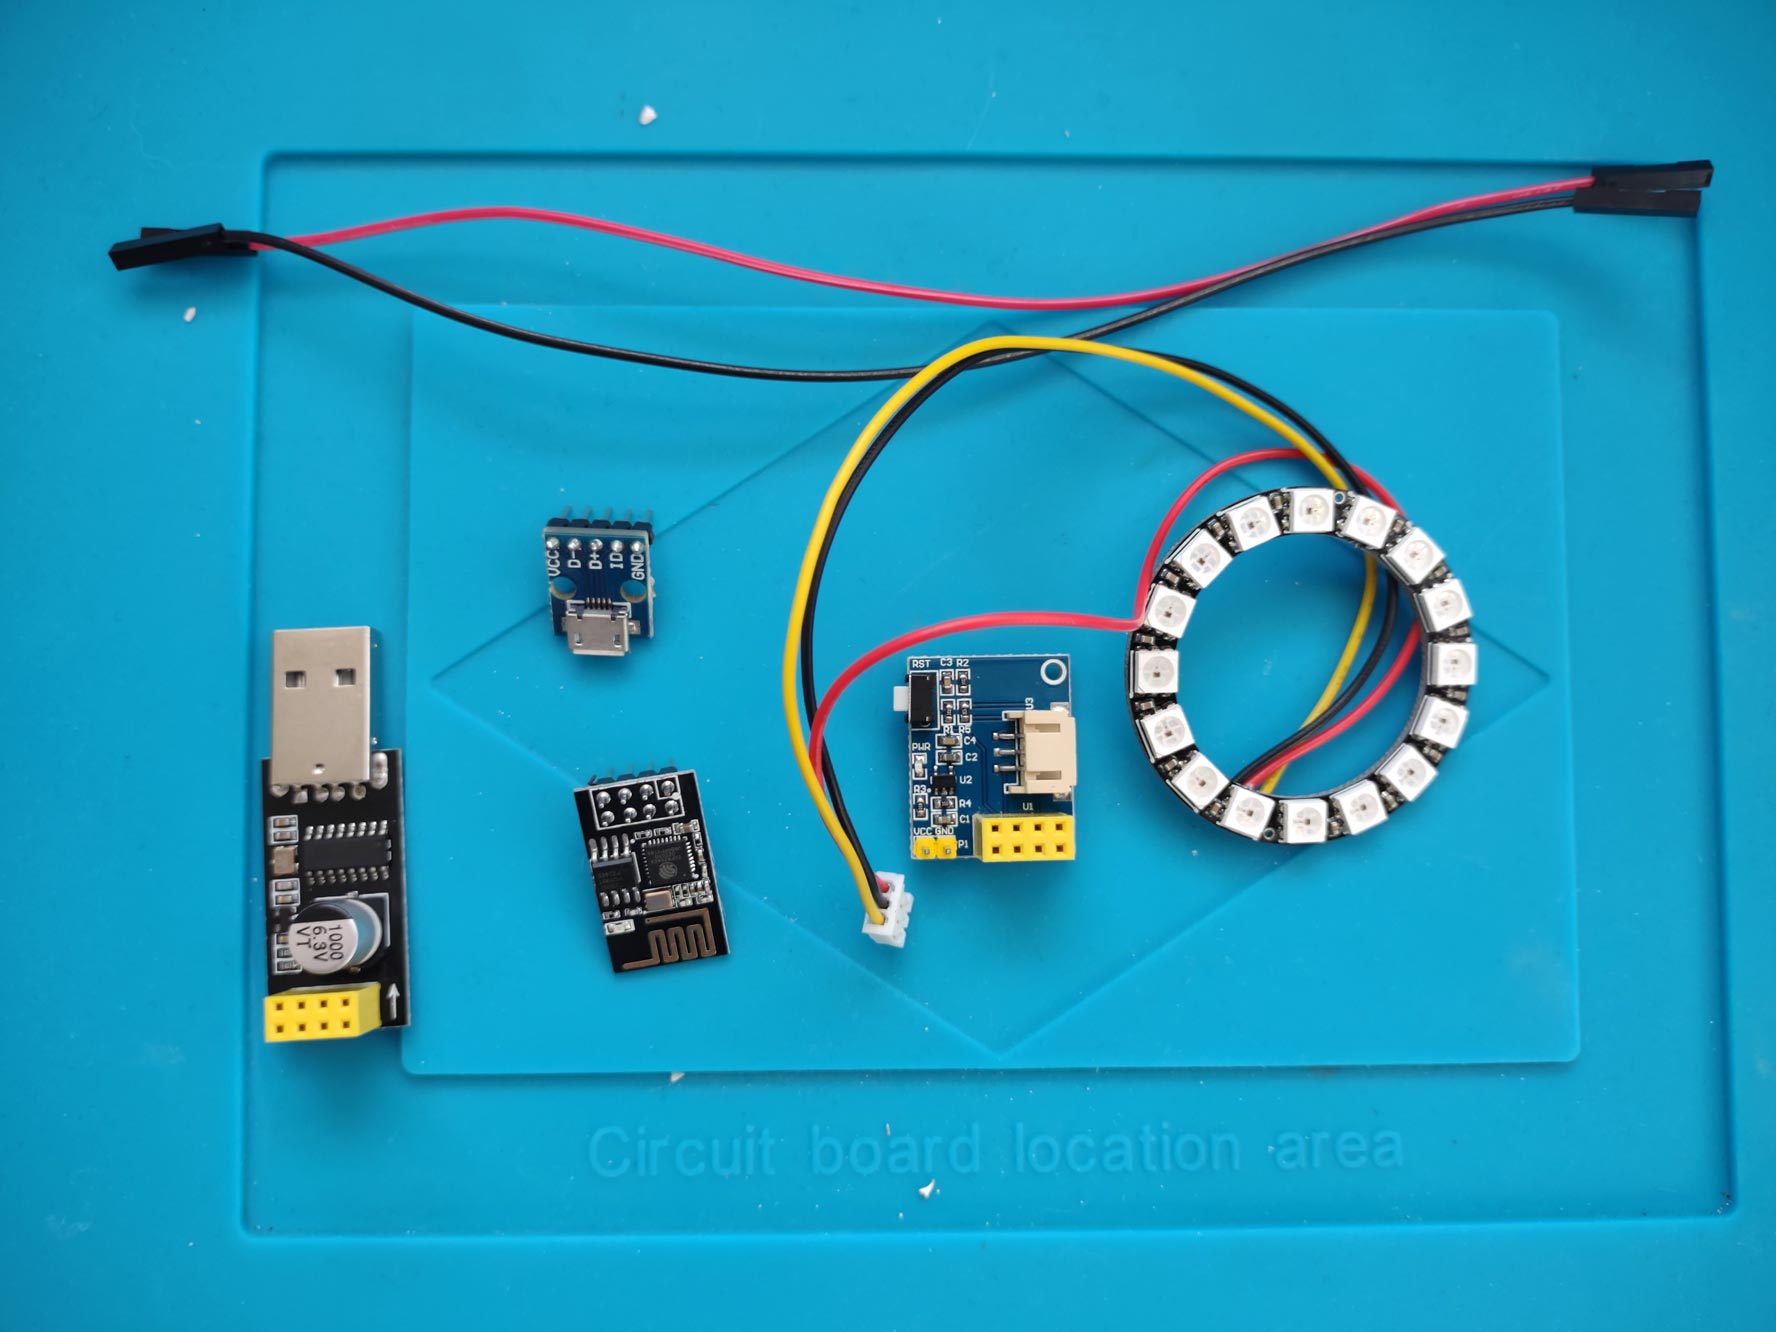
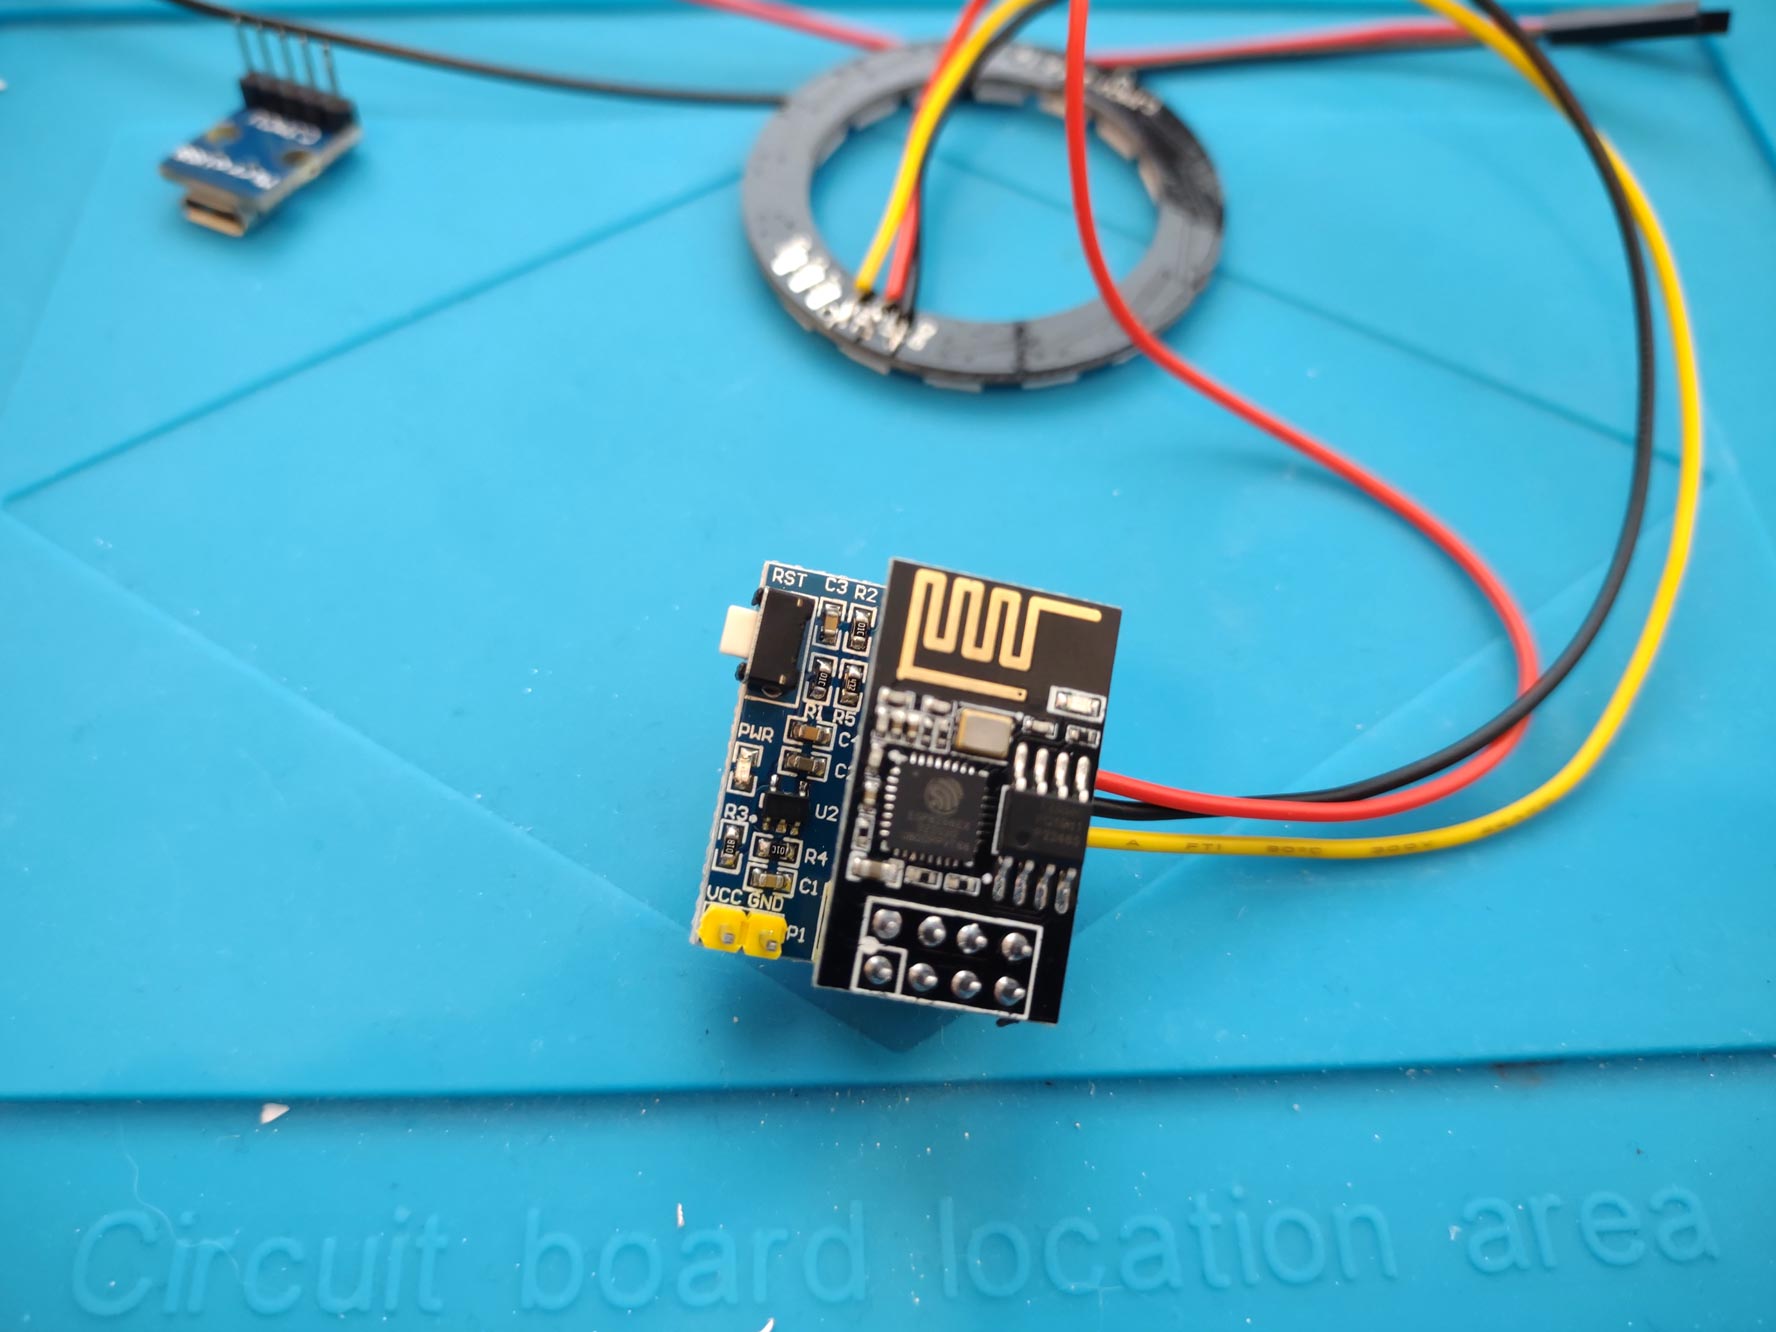
- ESP-01s
- An LED driver board (some driver boards will come with LEDs)
- Some WS2812b LEDs
- A 5v power source (I'm using USB, in this instance a breadboard compatible micro USB connector....and some hook up leads)
Where can get the parts?
- USB Programmer (Amazon link)
- ESP-01s (just 1) (Amazon link)
- ESP-01s (buy 5, make one for your mates) (Amazon link)
- Driver board (Amazon link)
- Ring of WS2812b 16 LEDs (Amazon link)
- Ring of 16 Neopixels (Adafruit shop)
- ESP-01s driver and LEDs (Amazon link)
- USB breadboard connectors (Amazon link)
The Amazon links are affiliate links, the tiny sum I might get may help me keep doing this.
So how do I do this?
The first thing we need to do is solder wires to the LEDs (if yours already has leads attached you can skip this step).
WARNING soldering irons get hot, get an adult to help (or an adultier adult).
- Unplug the lead from the driver board (if it's connected)
- Solder the black wire to the "GND" pad.
- Solder the yellow wire to the "IN" pad (could also be DI).
- Solder the red wire to the "VCC" pad (could also be V5).

Uploading the firmware
To program the ESP-01s I use the ESP8266Flasher (there are others available)
You can download the flasher at the address below (you'll find it in the Win32/Release or Win64/Release folders)
https://github.com/nodemcu/nodemcu-flasher
Now you have a programmer you need the firmware
The ESP-01s is based on the ESP8266 and has 1MB of memory (the amount of memory limits its functionality, no wireless updates)
The firmware you'll need is name WLED_x.xx.x_ESP8266_1M.bin (where the x's refer to the release number)
Visit the page https://github.com/Aircoookie/WLED/releases and download the file.
Now you have the firmware and the programmer it's time to program.
Step 1
Connect your ESP-01s to the programmer
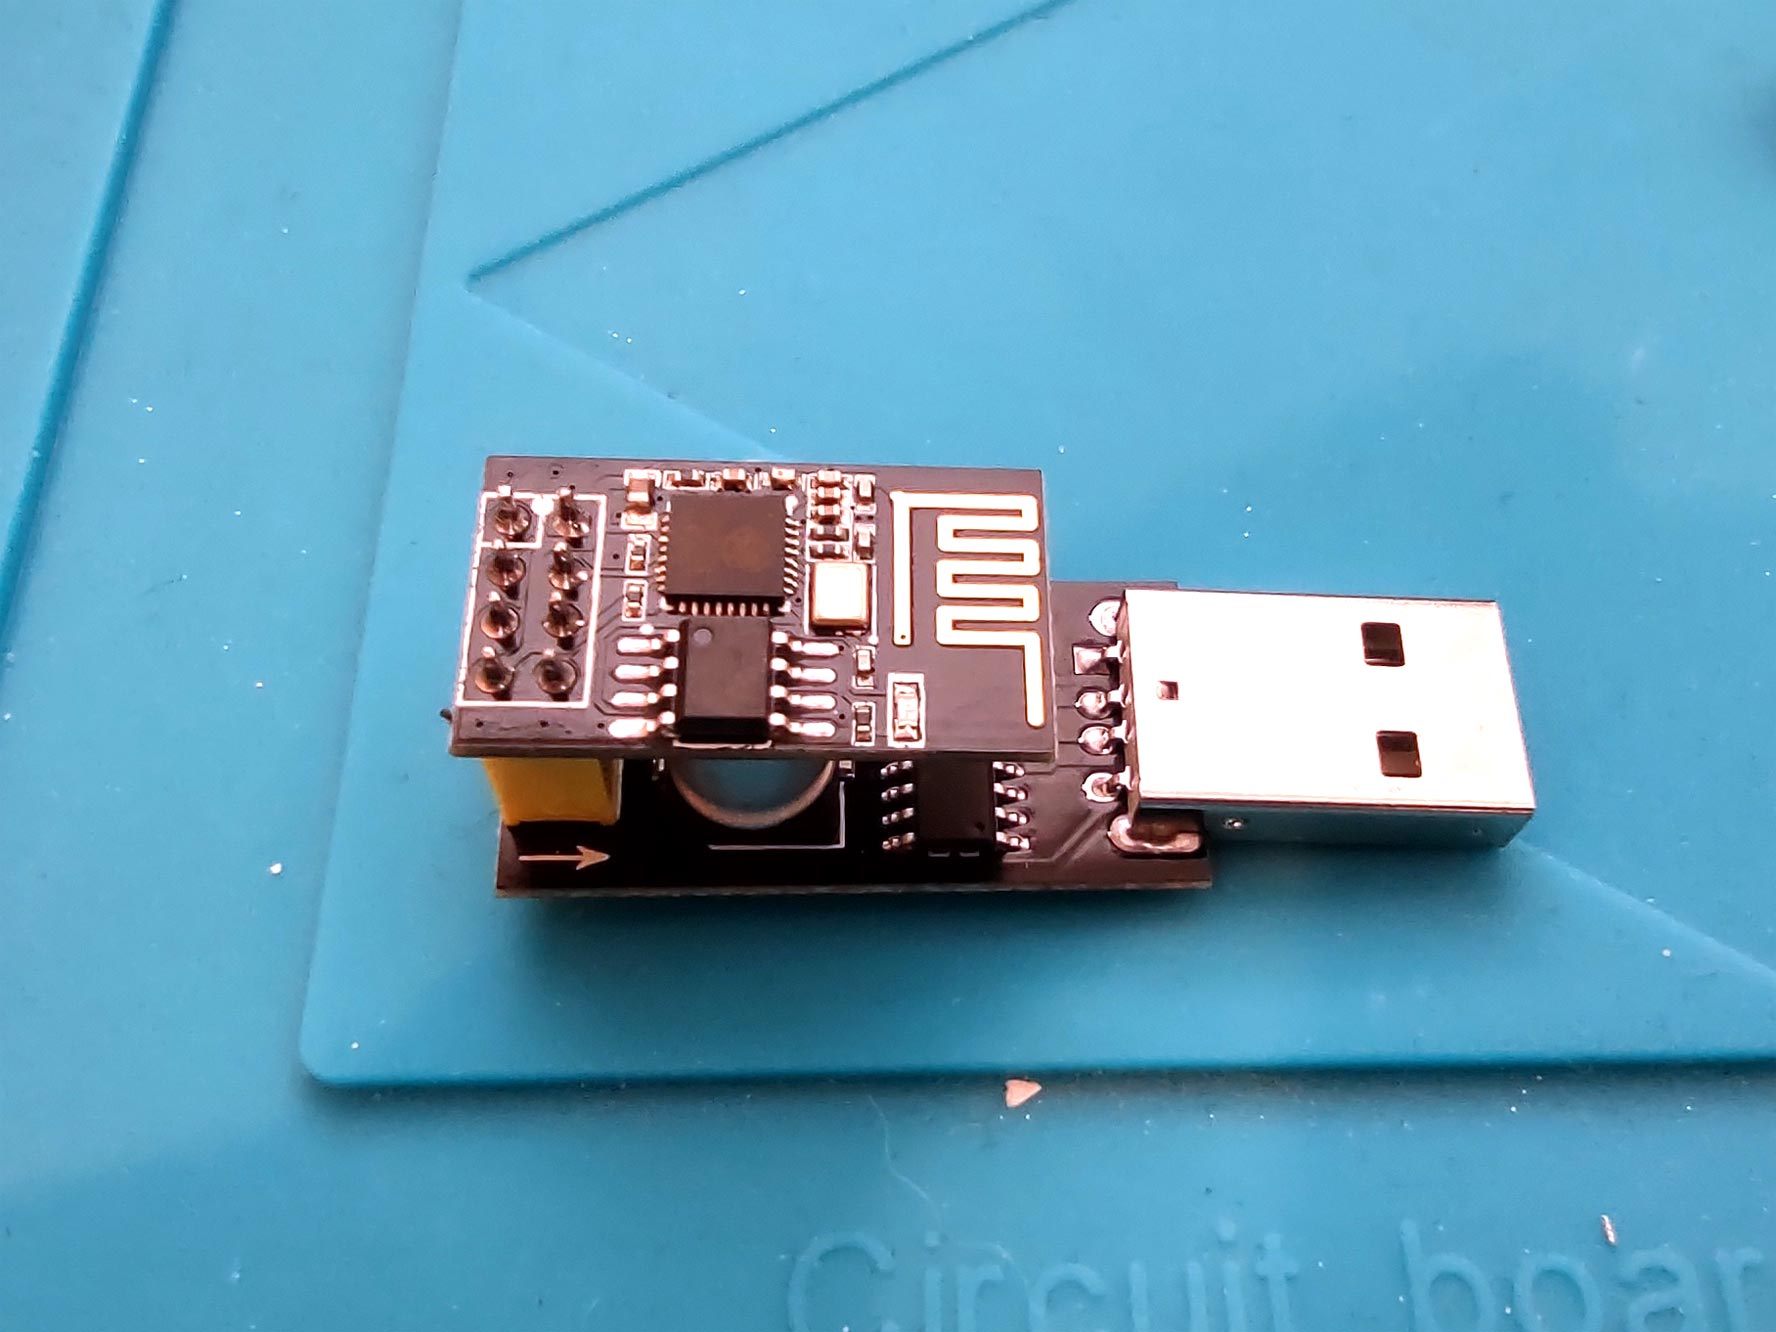
Step 2
Plug the programmer into a USB port
Step 3
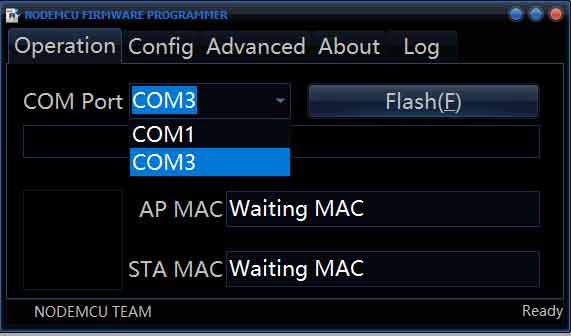
Start the programmer
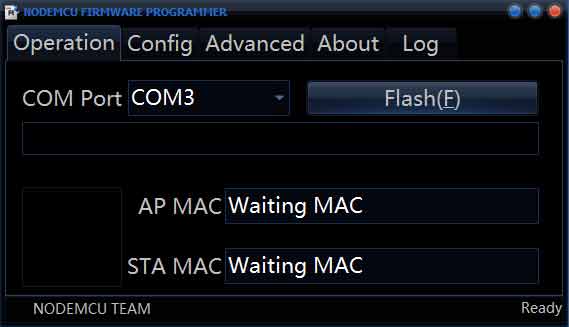
Step 4
Select the COM port for the progammer
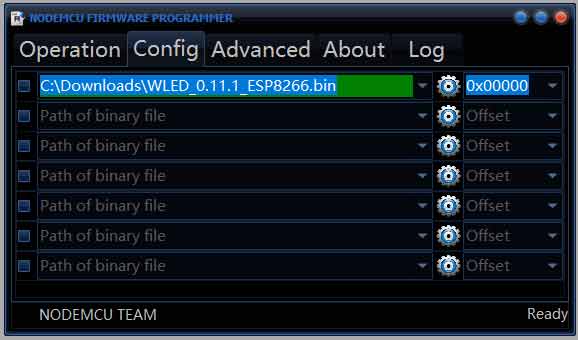
Step 5
Go to the Config tab, click the Cog icon on the firm line and then browse for the firmware downloaded earlier.
Step 6
Go back to the Operation tab and click Flash
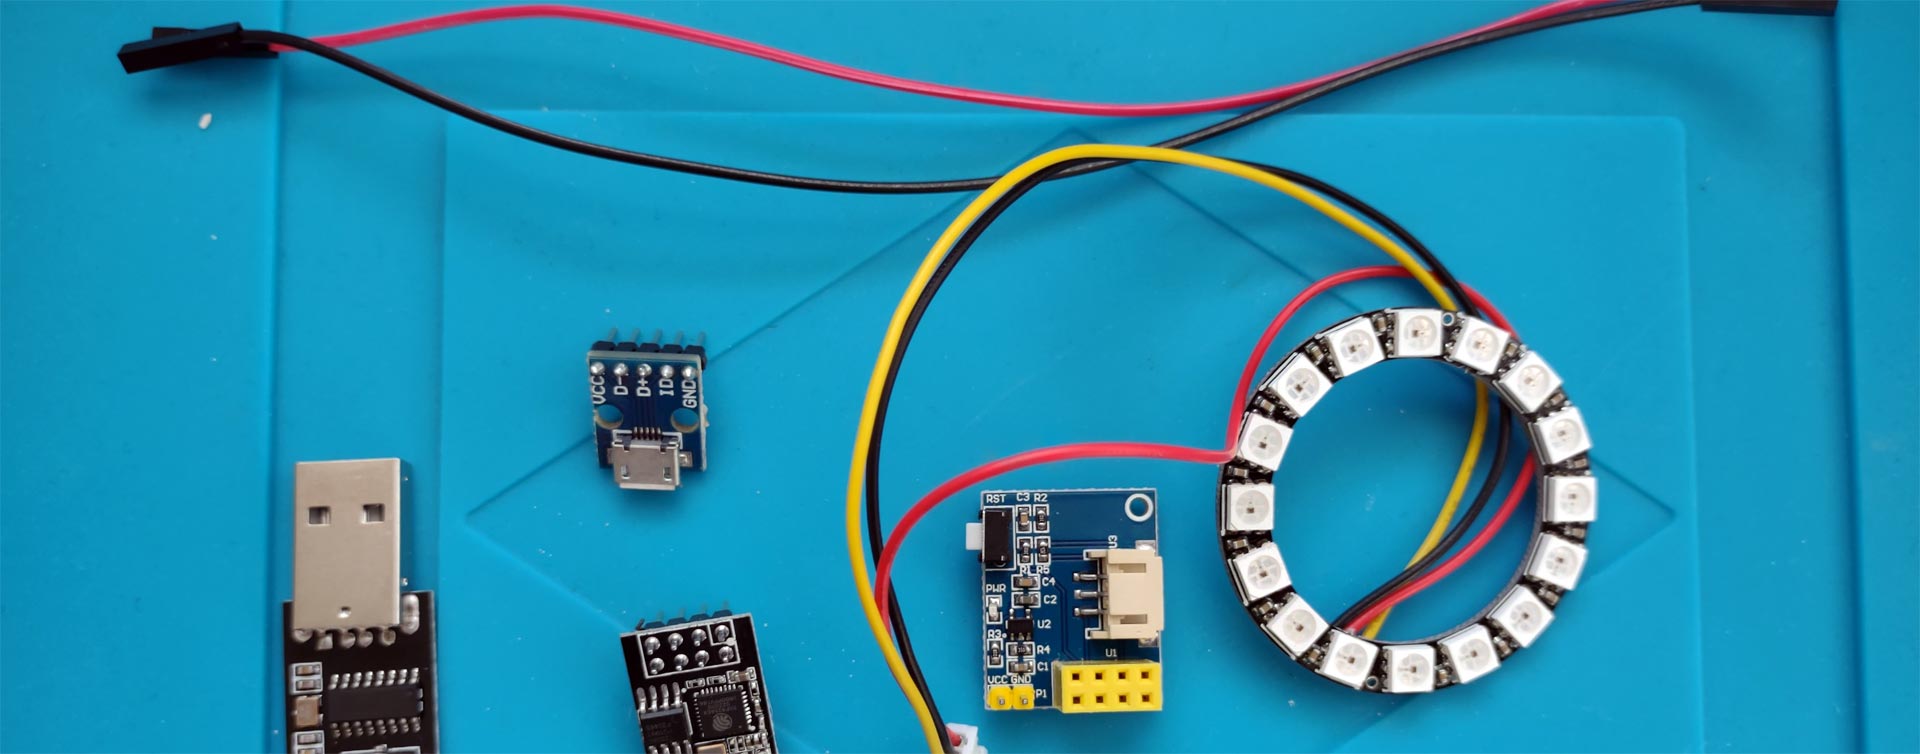
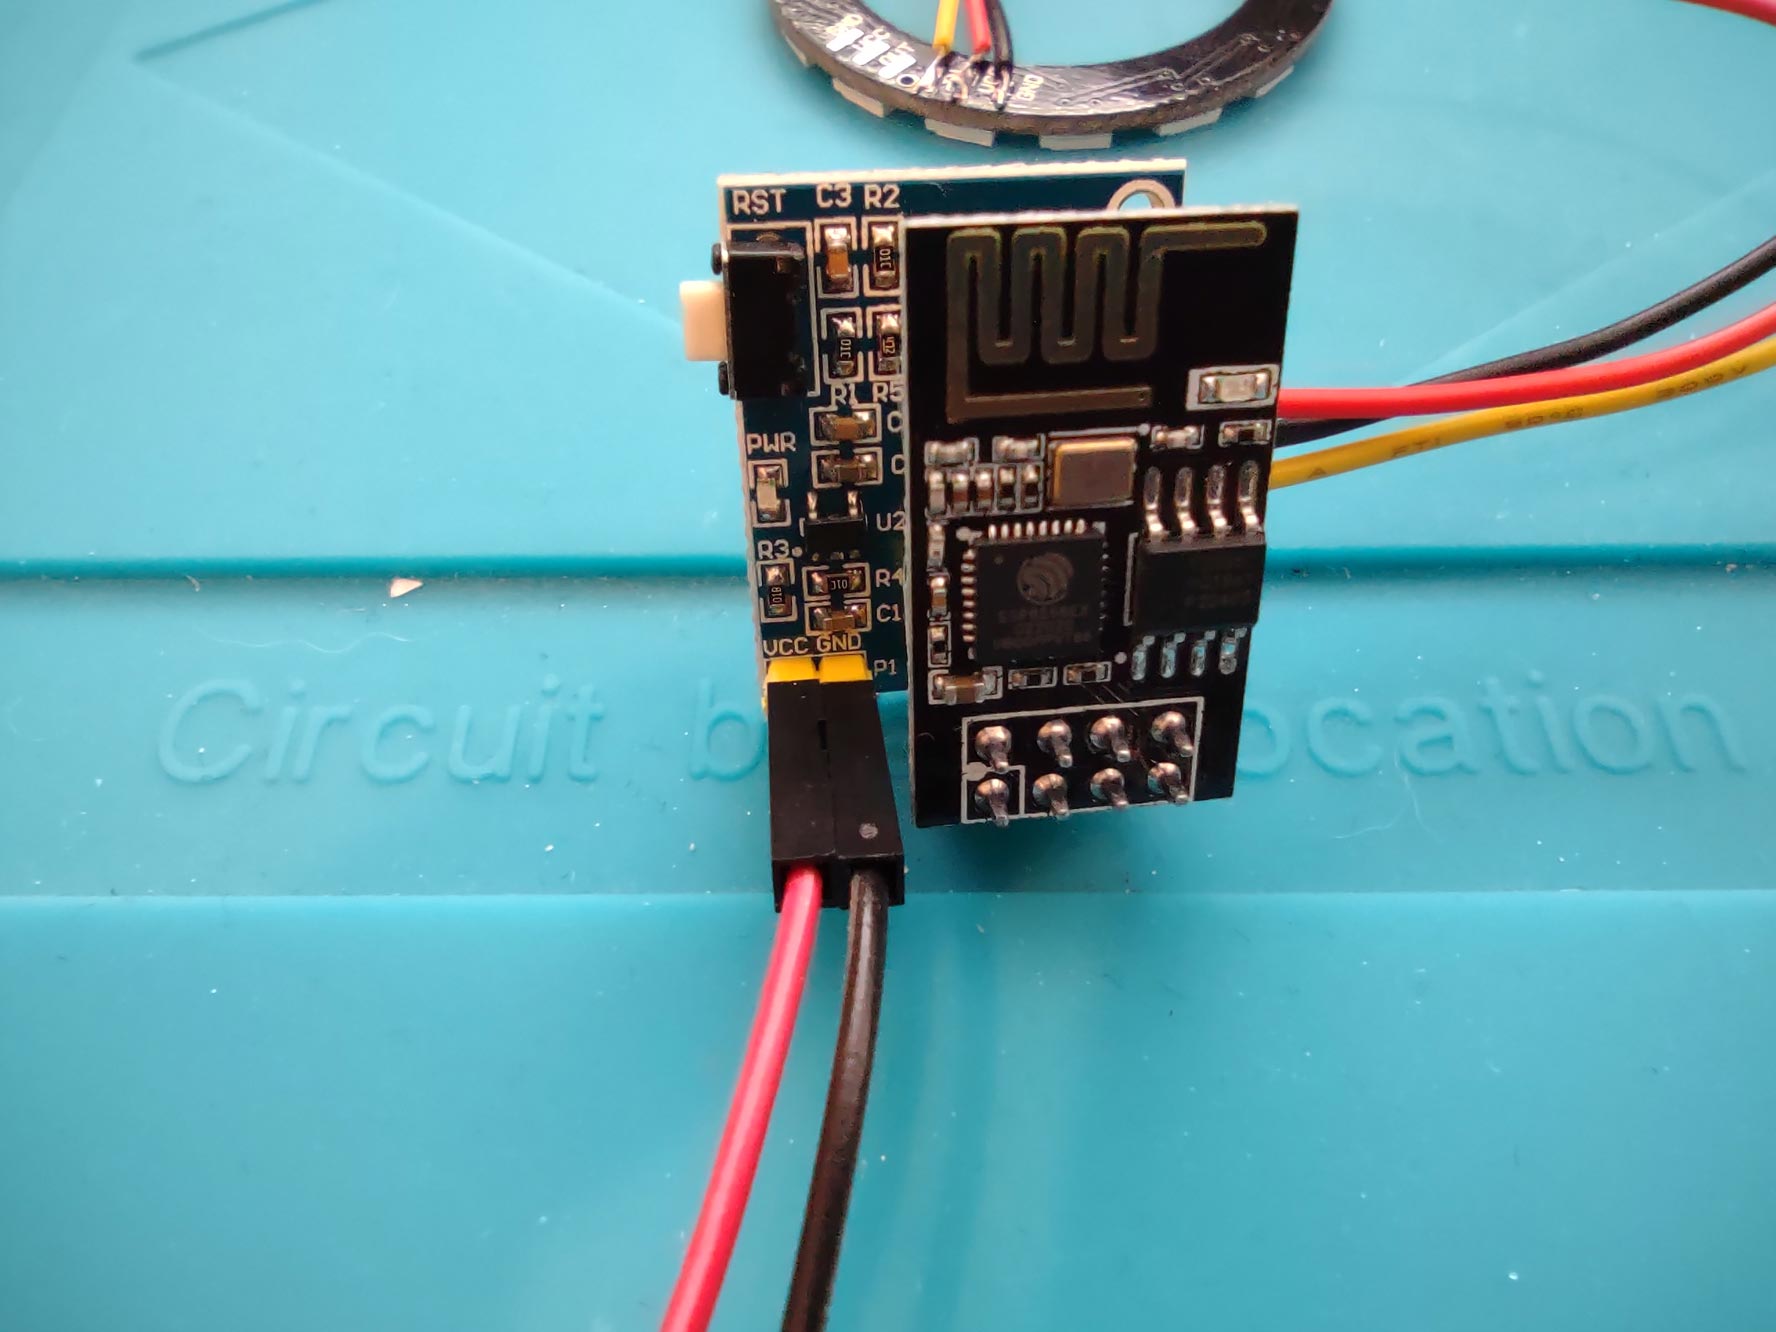
Connect the LEDs to the driver board

Connect the ESP-01s to the driver board
Supplying power
This particular driver board accepts 5v. The driver passes the 5v on to the LEDs but also regulates the 5v down to 3.3v for the ESP-01s (the ESP-01s will be damaged if you supply more than 3.3v).
To get 5v I'm using a USB port (keep in mind when running your LEDs the USB port on your computer cannot supply more than 500ma (you might get more if you use a power USB hub that has dedicated charging ports).
There are lots of alternative to getting 5v, a phone charger, a 5v wall wart.... (make sure you know what you're doing when I comes to electricity, if I doubt consult someone with more knowledge).
Step 1
Make sure the power is not connected (disconnect the USB connect from your PC or other power supply)
Connect the hookup leads to the micro USB connector
Pay attention to which lead you connect to which pin
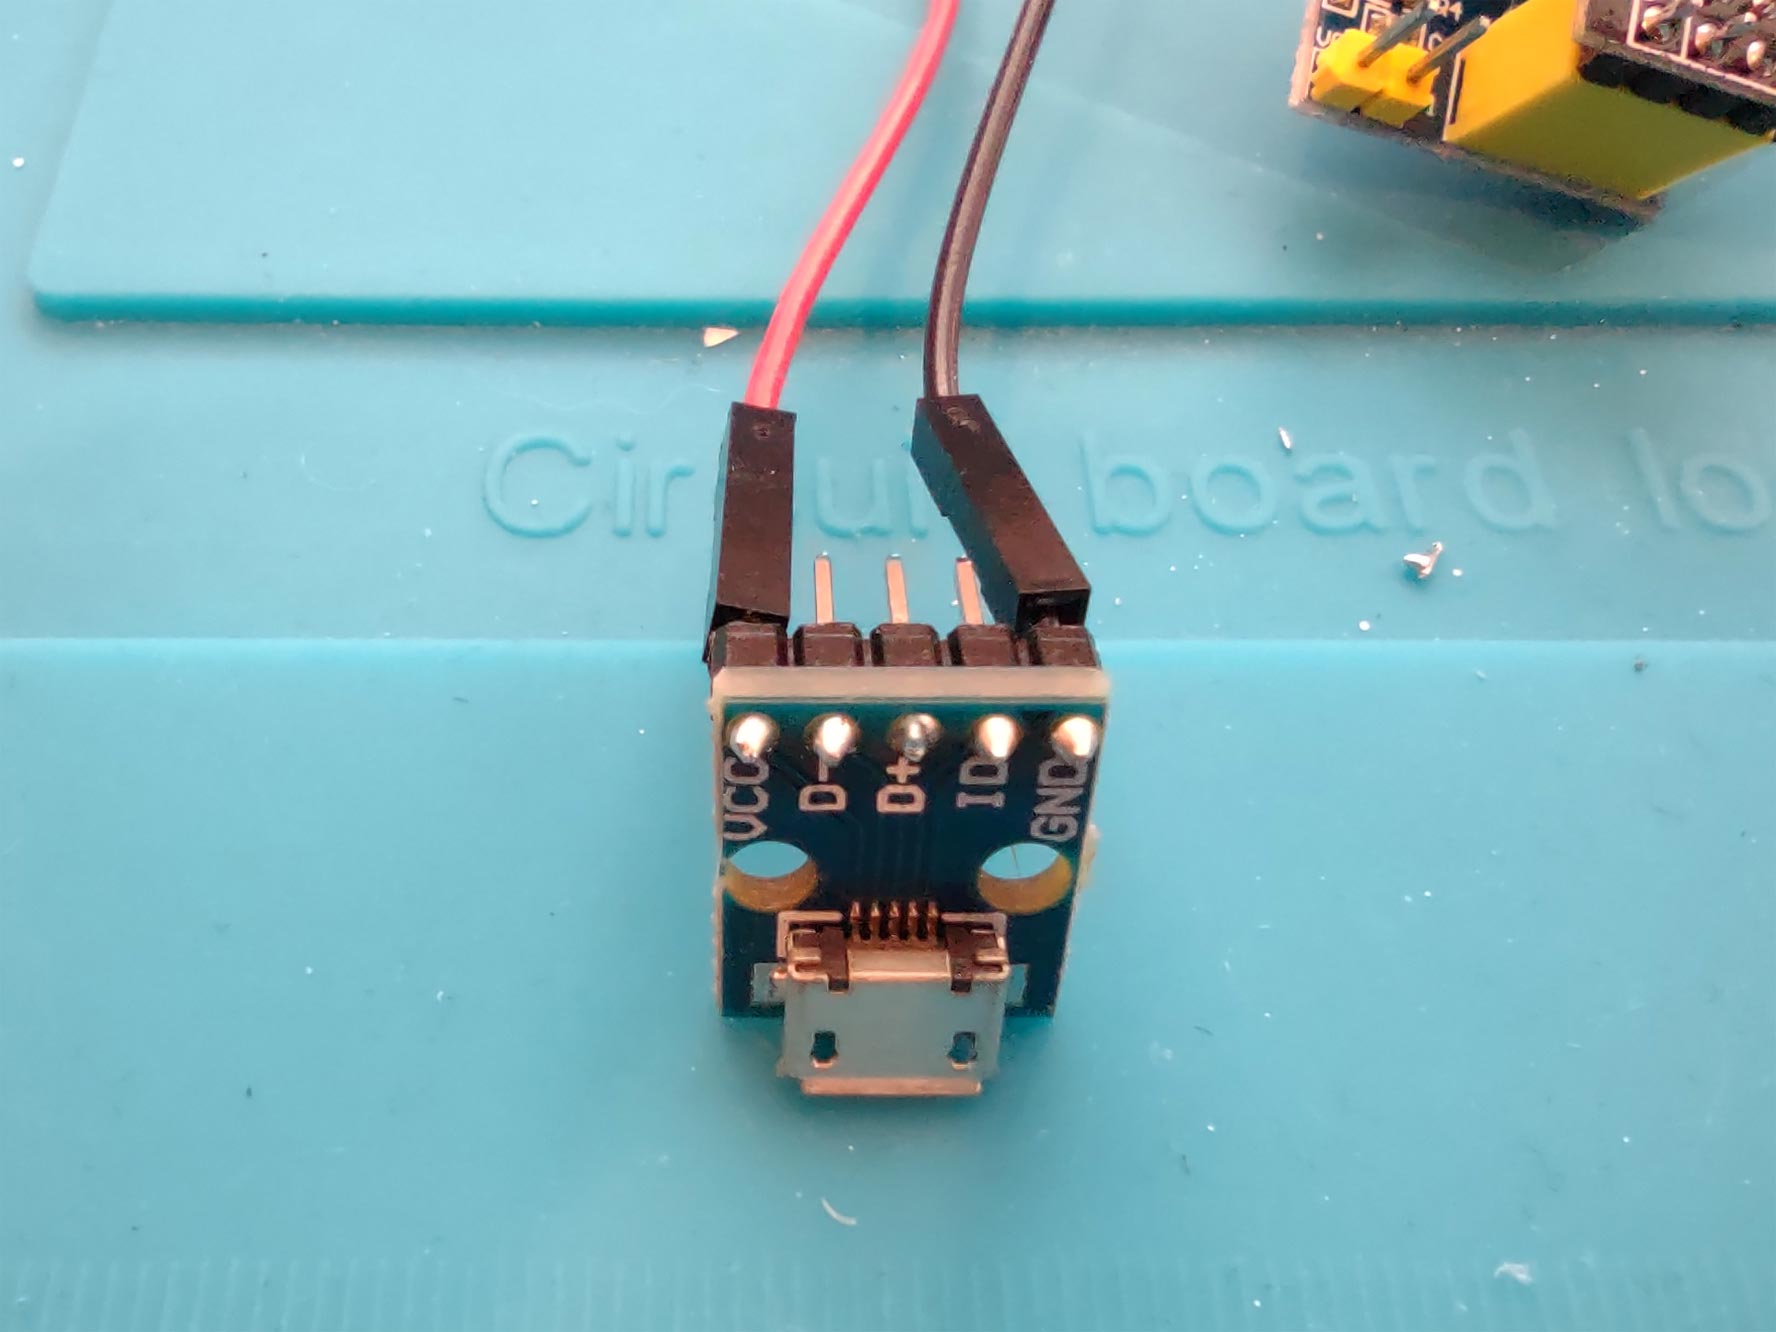
Step 2
Connect the other end of the hook up lead to the pins on the driver board, best start with ground (GND) first.
Step 3
Celebrate a job well done with nice cup of coffee (or tea) (....and possibly cake).
You can go through the configuration steps of the WLED firmware.
The device will appear as a new Wifi network called WLED-AP and has a default password of wled1234
You can then connect to the device on it's IP address of http://4.3.2.1
From there you connect the device to your own Wifi network, give it a name so Alexa can communicate with it etc.
Arrgh my eyes
To help with eye strain from bright LEDs there are a number of things you can do.
- In the LanternScape desktop app turn the brightness down
- Reflect the light off something else (point the LEDs away from you and bounce the light off another surface)
- Diffuse the light from the LEDs (in the devices I made, I used 3mm thick opal acrylic)
- There are probably other ways ....